0
(0)
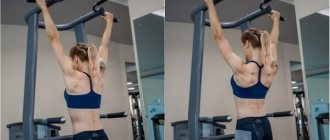
The push-up exercise has been around for hundreds of years.
This is an excellent training exercise for most muscles in the body and does not require any equipment. It can be done both on the street and at home. It does not require additional equipment and is suitable for beginners. Today you will learn a good program for push-ups at home.
In this post, I'm going to break down this amazing exercise and show you not only how to do it effectively, but also how to develop your own push-up workouts to get to that magical 100 reps in one set and introduce you to a program like 100 push-ups in one set. 6 weeks.
Muscles used during push-ups
Push-ups are a full-body exercise that works many major muscle groups, including:
- The pecs are your fan-shaped pectoral muscles and are heavily used in all floor push exercises.
- The triceps is another pushing muscle attached to the back of the arm. The triceps work hard to straighten the arm. So if you don't fully straighten your arm, you won't get the most out of these muscles.
- The deltoids – the shoulder muscles play a large role in all pushing exercises, but also in stabilizing the upper body to maintain balance during the exercise.
- The serratus anterior muscle is a muscle on either side of the rib cage that attaches to the shoulder blade and prevents it from flailing during movement. Well-developed serratus anterior muscles look like a bunch of bananas just under the armpit.
- Abdominal Press – Push-ups involve the work of the core muscles. From a push-up position, gravity forces your hips toward the floor, and it's your core muscles that prevent this from happening. You can think of the push-up as an exercise with a loose, moving board that you support with your hands.
- Gluteus muscles – The gluteus maximus muscles are responsible for stabilizing the hip muscles and the entire body. When you hold your body in a straight push-up position, these muscles help keep your hips extended in line.
- The latissimus dorsi is the large pterygoid muscle on the back of the body that runs from the arm down to the buttocks. They not only create internal rotation of the arm, but also help stabilize it all the way down to the buttocks!
- Secondary Muscles – The push-up uses many more muscles, which also help with proper body alignment and stabilization. The back of the body is actually more involved than you might imagine.
Safety and precautions
You shouldn't do push-ups, much less a 100-push-up program, if you have a shoulder, wrist, or elbow injury. Talk to your doctor or physical therapist to find out if this exercise is appropriate. If you want to protect your wrists, you can place your hands on dumbbells to keep them in a neutral position. If you feel pain in your shoulder during push-ups, or hear a clicking sound in your shoulder, finish the push-up exercise.
If there are no contraindications, do not forget to do a mandatory warm-up of the whole body before each workout.
If your physical fitness is weak or you have just started on the path to a healthy lifestyle, then I advise you to read the article on how to learn to do push-ups, it will help you understand the basic techniques and principles for performing the exercise safely.
An American media editor began doing push-ups 100 times a day. This is what came of it
Former Buzzfeed editor-in-chief Sam Stryker conducted a curious experiment on himself when he decided to do 100 push-ups daily for 30 days.
Sam’s advantage was that at that time he was not only the editor-in-chief of Buzzfeed, but was also a serious swimmer, so his arms and shoulders were already quite developed.
At the very beginning of the experiment, he received recommendations from a professional trainer, who gave him some tips on push-up technique. She also advised Sam to start with 10 sets of 10 repetitions, spreading them out evenly throughout the day.
“Don’t think that now you will do 70, and in the evening another 30. Be smart, distribute the load correctly,” his coach instructed him.
Sam went against his coach's advice and tried to do most of his push-ups early in the morning, which ended up causing a problem.
“I’m a morning person and it was natural for me to try to do as many push-ups as possible in the morning and immediately after training in the pool. Initially it worked because I was very passionate about the challenge, but after two weeks I realized that I had made a mistake,” Sam said.
Push-ups in the morning were becoming more and more difficult for him and he found that he was increasingly shifting the load to the second half of the day.
buzzfeed.com
“I didn’t have the desire to quit everything, but often I just did the exercises without any desire. And it’s not a matter of physical fatigue, but moral,” noted Sam.
Reminders on the phone became a way out. Sam performed 20 push-ups every hour during the workday, which allowed him not to be overloaded in the morning and free up the evening from routine.
“This was one of my most important discoveries,” Sam later admitted. — You need to plan your workout in a way that is convenient for you and stick to this schedule constantly. Then you will have no reason to come up with excuses for yourself.”
buzzfeed.com
It is worth noting that in 30 days the journalist experienced truly serious changes. His shoulders have clearly enlarged, his triceps and trapezius have become more prominent. However, it is worth noting that Sam was already swimming at that time, coming to the pool 4-6 times a week, so his body accepted these loads with greater benefit than if he had started training with zero physical fitness. But even “from scratch” you can pump yourself up well with similar challenges with squats, pull-ups or abdominal crunches.
youtube.com
Of course, such marathons are unlikely to make you a superhero, although this can happen. Here, for example, is the training program for the strongest superhero in history, Saitama from the anime series One Punch Man. 100 push-ups, 100 squats, 100 crunches and run 10 km every day. So there is no guarantee that after ten years of such training, all your hair will not fall out and you will not cut everyone out with one blow.
How to do perfect push-ups?
Let's look at the push up itself and see how to properly perform the push-up exercise.
Hands
Hand position can vary, and generally the closer your hands are to each other, the more triceps are recruited.
- The wider your arms, the more you use your shoulders.
- We'll talk more about the different types of push-ups later.
- For now, let's keep our hands shoulder-width apart and directly under our shoulders. Your fingertips should be pointing forward.
- If you struggle with painful wrists, then you can try forming a fist and doing fist push-ups.
- Use a mat or towels under your fists to make it more comfortable.
- Another option to avoid wrist pain is to try using push-ups where your hands are in a different position.
Legs
Keeping your feet together will better engage your core muscles, but if you find yourself in an unsteady or uncomfortable position, move your feet to a comfortable distance.
You may have seen people doing push-ups with one leg over the other or with their legs in the air, these variations place less stability on the legs and challenge the core and shoulder muscles to stabilize them more during the movement.
shoulder blades
During a push-up, your shoulder blades will want to spread their “wings” or stick out back. Winged shoulder blades are very common and often come down to weak serratus anterior muscles, so it's important that you work hard to keep your back flat as you move.
When you think about the middle of your back between your shoulder blades, you want to actively push that area up and not allow that part to sag down when you get tired. Make sure you finish the top of the movement by pushing upward through the middle of your back.
Smooth body
In the starting push-up position, there should be a straight line from head to heels. You can test this position by asking a friend to place a broom along your back, and based on their feedback, you can adjust your position accordingly.
Stabilizing the body, tightening the abdominal muscles and contracting the buttocks should bring everything into alignment.
If your posture changes during the exercise and your lower back begins to arch, then it's time to stop. A arched lower back is usually a sign of core weakness, and you may want to work on strengthening exercises first before moving on to push-ups.
Head
A good rule of thumb is to look down directly in front of your hands.
Keep your head still throughout the movement, and you should not sway during the exercise, even when you are tired.
Elbows
The elbows should not be extended during the down and up phase of the movement. You never push anything with your elbows out, so now is not the time to start. Keep your elbows close to your body for a more favorable shoulder angle.
During the downward phase of the push-up, press your hands into the floor towards your body, this will activate your latissimus dorsi muscles down the back and sides of your body. You should feel the muscles under your arms activate as you pull yourself down towards the floor.
At the top of the movement, you should aim to straighten your arms. Don't pull your elbows back, but make sure they are straight to activate the triceps muscles on the back of your arms.
Push-up speed
You can perform push-ups at different speeds, but I would recommend a controlled pace of 2 seconds down and 2 seconds up. Don't let your body fall to the floor.
Pull your body down under control. It's during the downward phase that you really gain the most strength, so don't miss half the exercise by falling to the floor.
As you become more advanced at the push-up, you can slowly lower yourself and rise back up again with a big bang, but to begin with, you'll want to focus on technique and control the movement.
Push-up depth
Your goal is to achieve a 90 degree angle at your elbow. If you go much deeper than required, you increase the risk of soft tissue and ligament damage.
If you need help determining the depth of the push-up, you can place a rolled-up towel under your chest and aim to touch it with your chest on each rep.
Breath
As you go down, take a deep breath, and as you go up, exhale.
When performing more powerful pushup variations, such as clapbacks and plyo pushups, you may need to hold your breath for a split second to get maximum core tension.
The reason you need to hold your breath is because the diaphragm acts as a secondary stabilizer of the core muscles, so it is impossible to simultaneously breathe consistently and perform the exercise with maximum effort.
Common Mistakes
It's easy to start making push-up mistakes if you're tired or don't have enough strength. Look for them and switch to an easier option if you can't maintain the desired shape.
Sagging in the middle
The most common problem is sagging in the middle, caused by improper core bracing. This may cause back pain. Try doing push-ups on your knees, practicing keeping your torso tight.
Smooth neck
The neck should be in a neutral position, the head should be in a straight line with the spine, and the eyes should be on the floor. If you lift your chin up or lower your head until you can see your toes, you are making a mistake. By the way, good material about the spine, quite generalized but sensible, I recommend it.
Elbow extension
Fully extending your elbows at the top of the movement is a mistake you can make when you get tired and want to rest a little. This puts too much stress on your joints and can lead to injury. Always keep your elbows slightly bent. If you're tired, it's time to rest before doing another set.
Hands too far forward
If your arms are further away than your shoulders, you put more stress on them. Although you can vary how close your hands are to each other to get different effects, your hands should still be under your shoulders.
Limited range of motion
If you're only going down partially on most of your pushups, you're not getting the benefit you need. It's best to switch to an easier modification (such as kneeling or bent-over pushups) that you can do through a full range of motion.
What to do if you can't do a single push-up?
Many people struggle to do just one perfect push-up.
Ladies in particular find push-ups more difficult due to lack of strength. No, I'm not sexist, but men tend to have more upper body strength.
If you find it difficult to do push-ups, you need to regress the movement in order to perform it correctly and avoid injury.
Here's how to do it:
- Wall push-ups: Start by doing push-ups with your hands against the wall, with your feet about a meter away from the wall. When you can complete 20 repetitions, move on to the next level.
- Table push-ups: Perform a push-up with your hands on the edge of a table. Make sure the table is leaned against the wall to prevent it from wobbling. After 20 repetitions, move on to the next stage.
- Push-ups from a chair or stool: the final stage is to lower your hands even lower, onto a chair or stool. Once you can complete 20 reps, lower yourself to the floor.
- Half push-ups: You may not need this step, but if you do, do push-ups from your knees. It is very important that you maintain a straight line from your head to your knees even during this version of the push-up.
Progress in the number of push-ups
Once you perform perfect pushups, you can begin the process of increasing your pushups. You will soon learn the push-up program for gaining muscle mass. Be patient and increase the number of push-ups by placing them in a 5-stage .
Initial assessment
If you want to increase the number of push-ups you can do, you first need to know your starting point.
How many push-ups can you do right now without resting?
Complete as many as you can with perfect form. If your hips start to sag or you lift your hips up to rest, then it's time to stop. Write down this maximum number.
Setting up an initial workout
Now you know how much you can do at one time, you need to create a workout to improve your maximum. I have found that 5 sets generally work best for improving your push-ups. You want to perform twice as many reps as you did in your initial assessment.
So here's how you calculate the numbers for your workout:
- Multiply your maximum number by 2.
- Divide the new number by 5.
- So, if your max was 20: 20 x 2 = 40/5 = 8 reps .
- Perform 5 x 8 reps for a total of 40 reps .
- Rest 60-90 seconds between each set of 8 reps .
This simple formula allows you to create a starting workout that will help improve your push-ups. However, in order to get stronger, you need to progress with each subsequent workout.
6 - week training plan
Thus, you have found out your initial push-up performance. Now let's extend them by 6 weeks and create the right training program so you can get stronger and continue to get results from your workouts at home or outdoors.
Training 3 times a week
I recommend everyone start with 3 workouts per week . Program for Monday, Wednesday and Friday. Remember that you are really getting a strength boost, so you need to rest on these days. More training is not always good for the body. If you find that it's too painful to do the push-up routine when it's time to do the workout, then you can take another day to rest.
Time relax
To improve your push-ups, you need to rest between each set. I have found that 60-90 seconds is a normal rest period.
If you are working with lower numbers, then the rest should be longer, since this is more of a strength training for you.
If you are working at higher numbers the rest may be shorter as it is more endurance oriented.
100 push-ups program
The 100 push-ups program will give you the opportunity to start with a minimum number of repetitions, and gradually increase the number of repetitions to the desired hundred. Initially, you should try to determine your level of preparation. It's easy to do. You just need to do push-ups on the floor as many times as you can. If you cannot repeat the exercise more than seven times, you are a beginner. If you can do 20-30 push-ups, your fitness level is average. Well, those who can easily do more than thirty push-ups can safely consider themselves a person with good physical fitness, strong arms and well-developed pectoral muscles.
The 100 Push-Ups in 6 Weeks Program will allow you to learn how to do a hundred push-ups in one session. But, of course, remember that results can only be achieved through regular training. That is, you cannot skip workouts or reduce the recommended number of repetitions. But rest will be needed, since the muscles and the body as a whole must be able to recover. The ideal scheme is as follows: you train for three days and rest for a day.
Since push-ups primarily work the upper body, they can be supplemented with abdominal exercises and regular squats for a complete full-body workout.
Those who want to develop their pectoral muscles and triceps cannot do without push-ups. The 100 push-ups program in 6 weeks is available for mastering at home , since simulators and special equipment are not required for it. It is well suited for men who want to increase muscle mass. It also trains endurance well.
Many people are interested in whether the program for push-ups 100 times requires any specific nutrition. If you want to increase muscle mass, then, of course, you will have to make adjustments to your diet. You need to eat plenty of proteins, consume complex carbohydrates, which are found in cereals, cereals, vegetables and fruits. If you are working specifically on muscle mass, you don’t have to exclude fatty types of meat from your diet and generally don’t particularly limit yourself in nutrition. But try not to mix carbohydrates and fats. So, try to eat meat with vegetables, but eat porridge separately, as breakfast, and not as a side dish, as we are used to.
But those who are interested in how to learn how to do 100 push-ups, not only to work out muscles, but also to burn excess fat, should limit themselves to animal fats and sugar. But you shouldn’t exclude fish from your diet, even if it’s fatty.
The 100 push-ups program is essentially suitable for everyone, and it is not necessary to consult a doctor before starting. But it is important to be able to independently assess your health. In the absence of problems with muscles and joints, with the respiratory and circulatory systems, nothing should prevent you from achieving your goal of one hundred push-ups. But for people who are third degree obese, it will be difficult to do push-ups. Before starting to master this program, they should first lose excess weight. Also among the contraindications to push-ups are recent injuries.
Linear push-up program
You'll start with calculations based on your initial estimate. The next method is simple: you simply add one extra rep to each set each workout.
So, taking the example above, if you completed 20 max reps , your first 3 workouts would look like this:
Week 1
| Monday | Set 1 – 8 reps | Set 2 – 8 reps | Set 3 – 8 reps | Set 4 – 8 reps | Set 5 – 8 reps | Total reps: 40 |
| Wednesday | Set 1 – 9 reps | Set 2 – 9 reps | Set 3 – 9 reps | Set 4 – 9 reps | Set 5 – 9 reps | Total reps: 45 |
| Friday | Set 1 – 10 reps | Set 2 – 10 reps | Set 3 – 10 reps | Set 4 – 10 reps | Set 5 – 10 reps | Total reps: 50 |
Week 6
| Monday | Set 1 – 23 reps | Set 2 – 23 reps | Set 3 – 23 reps | Set 4 – 23 reps | Set 5 – 23 reps | Total reps: 115 |
| Wednesday | Set 1 – 24 reps | Set 2 – 24 reps | Set 3 – 24 reps | Set 4 – 24 reps | Set 5 – 24 reps | Total reps: 120 |
| Friday | Set 1 – 25 reps | Set 2 – 25 reps | Set 3 – 25 reps | Set 4 – 25 reps | Set 5 – 25 reps | Total reps: 125 |
So by following this method, by week 6 you will be performing a total of 125 push-ups .
Now recheck your maximum.
You will find that your max should now be around the 60 push-up mark in 6 weeks !
Training program 100 push-ups
| Day | Approaches | Total | ||||||||
| A week #1 | ||||||||||
| 1 | 6 | 6 | 4 | 4 | 5 | 25 | ||||
| 2 | 6 | 8 | 6 | 6 | 7 | 33 | ||||
| 3 | 8 | 10 | 7 | 7 | 10 | 42 | ||||
| A week #2 | ||||||||||
| 1 | 9 | 11 | 8 | 8 | 11 | 47 | ||||
| 2 | 10 | 12 | 9 | 9 | 13 | 53 | ||||
| 3 | 12 | 13 | 10 | 10 | 15 | 60 | ||||
| A week #3 | ||||||||||
| 1 | 12 | 17 | 13 | 13 | 17 | 72 | ||||
| 2 | 14 | 19 | 14 | 14 | 19 | 80 | ||||
| 3 | 16 | 21 | 15 | 15 | 21 | 88 | ||||
| A week #4 | ||||||||||
| 1 | 18 | 22 | 16 | 16 | 25 | 97 | ||||
| 2 | 20 | 25 | 20 | 20 | 28 | 113 | ||||
| 3 | 23 | 28 | 23 | 23 | 33 | 130 | ||||
| A week #5 | ||||||||||
| 1 | 28 | 35 | 25 | 22 | 35 | 145 | ||||
| 2 | 18 | 18 | 20 | 20 | 14 | 14 | 16 | 40 | 160 | |
| 3 | 18 | 18 | 20 | 20 | 17 | 17 | 20 | 45 | 175 | |
| A week #6 | ||||||||||
| 1 | 40 | 50 | 25 | 25 | 50 | 190 | ||||
| 2 | 20 | 20 | 23 | 23 | 20 | 20 | 18 | 18 | 53 | 215 |
| 3 | 22 | 22 | 30 | 30 | 25 | 25 | 18 | 18 | 55 | 245 |
Increasing the push-up program
I found the above linear approach to be very effective, but it can be quite boring and the muscle stimulation is not as high as it could be.
Therefore, I prefer to use the wave method, which means that the numbers do not remain consistent from one approach to the next. Here is an optimal example that I compiled personally, based on the same maximum estimate as above:
Week 1
| Monday | Set 1 – 8 reps | Set 2 – 10 reps | Set 3 – 7 reps | Set 4 – 7 reps | Set 5 – 8 reps | Total reps: 40 |
| Wednesday | Set 1 – 9 reps | Set 2 – 8 reps | Set 3 – 11 reps | Set 4 – 8 reps | Set 5 – 9 reps | Total reps: 45 |
| Friday | Set 1 – 13 reps | Set 2 – 15 reps | Set 3 – 12 reps | Set 4 – 12 reps | Set 5 – 13 reps | Total reps: 50 |
Week 2
| Monday | Set 1 – 11 reps | Set 2 – 10 reps | Set 3 – 10 reps | Set 4 – 11 reps | Set 5 – 13 reps | Total reps: 55 |
| Wednesday | Set 1 – 14 reps | Set 2 – 12 reps | Set 3 – 11 reps | Set 4 – 11 reps | Set 5 – 12 reps | Total reps: 60 |
| Friday | Set 1 – 12 reps | Set 2 – 11 reps | Set 3 – 11 reps | Set 4 – 11 reps | Set 5 – 10 reps | Total reps: 65 |
Week 3
| Monday | Set 1 – 14 reps | Set 2 – 13 reps | Set 3 – 16 reps | Set 4 – 13 reps | Set 5 – 14 reps | Total reps: 70 |
| Wednesday | Set 1 – 15 reps | Set 2 – 14 reps | Set 3 – 14 reps | Set 4 – 17 reps | Set 5 – 15 reps | Total reps: 75 |
| Friday | Set 1 – 16 reps | Set 2 – 15 reps | Set 3 – 15 reps | Set 4 – 16 reps | Set 5 – 18 reps | Total reps: 80 |
Week 4
| Monday | Set 1 – 19 reps | Set 2 – 16 reps | Set 3 – 16 reps | Set 4 – 17 reps | Set 5 – 17 reps | Total reps: 85 |
| Wednesday | Set 1 – 17 reps | Set 2 – 20 reps | Set 3 – 17 reps | Set 4 – 18 reps | Set 5 – 18 reps | Total reps: 90 |
| Friday | Set 1 – 18 reps | Set 2 – 18 reps | Set 3 – 21 reps | Set 4 – 19 reps | Set 5 – 19 reps | Total reps: 95 |
Week 5
| Monday | Set 1 – 17 reps | Set 2 – 17 reps | Set 3 – 24 reps | Set 4 – 20 reps | Set 5 – 22 reps | Total reps: 100 |
| Wednesday | Set 1 – 16 reps | Set 2 – 18 reps | Set 3 – 21 reps | Set 4 – 27 reps | Approach 5 – 23 comments | Total reps: 105 |
| Friday | Set 1 – 17 reps | Set 2 – 17 reps | Set 3 – 22 reps | Set 4 – 24 reps | Set 5 – 30 reps | Total reps: 110 |
Week 6
| Monday | Set 1 – 31 reps | Set 2 – 18 reps | Set 3 – 23 reps | Set 4 – 25 reps | Set 5 – 18 reps | Total reps: 115 |
| Wednesday | Set 1 – 16 reps | Set 2 – 35 reps | Set 3 – 24 reps | Set 4 – 26 reps | Set 5 – 19 reps | Total reps: 120 |
| Friday | Set 1 – 17 reps | Set 2 – 30 reps | Set 3 – 25 reps | Set 4 – 30 reps | Set 5 – 23 reps | Total reps: 125 |
You will notice that the total number of repetitions performed is exactly the same as with the linear method, the only difference is the distribution of repetitions across all 5 approaches .
Push-up program for 100 reps
If you are a beginner and you can’t do push-ups, then a simplified push-up pattern will suit you first.
For those who can do 0-9 push-ups
Here, instead of regular push-ups, a lightweight version is performed - push-ups from the floor from the knees:
- Training frequency – 3 times a week
- Duration of the scheme is 3-4 weeks
Week 1
- Workout – 2 sets of 10 reps
- Workout – 3 sets of 10 reps
- Workout – 4 sets of 10 reps
Week 2
- Workout – 2 sets of 15 reps
- Workout – 3 sets of 13 reps
- Workout – 1 set of 18 reps
Week 3
- Workout – 3 sets of 15 reps
- Workout – 1 set of 21 reps
- Workout – 2 sets of 19 reps
Week 4
- Workout – 2 sets of 20 reps
- Training - rest
- Workout (record) – 1 set of 25-30 repetitions
Perhaps you will be able to reach 25-30 push-ups from your knees a little earlier. This means that you can already do 10 full push-ups.
Congratulations! You've taken the first step towards 100 rep push-ups.
For those who can do at least 10 push-ups
The push-up program will look like this:
- Training frequency – 3 times a week
- Scheme duration 14 weeks
Week 1
- Workout – 2 sets of 10 reps
- Workout – 3 sets of 10 reps
- Workout – 4 sets of 10 reps
Week 2
- Workout – 3 sets of 13 reps
- Workout – 2 sets of 16 reps
- Workout – 1 set of 20 reps
Week 3
- Workout – 2 sets of 16 reps
- Workout – 3 sets of 16 reps
- Workout – 4 sets of 16 reps
Week 4
- Workout – 2 sets of 20 reps
- Training - rest
- Workout (record) – 1 set of 30 reps
Week 5
- Workout – 3 sets of 22 reps
- Workout – 2 sets of 28 reps
- Workout – 1 set of 35 reps
Week 6
- Workout – 2 sets of 30 reps
- Workout – 3 sets of 27 reps
- Workout – 1 set of 40 reps
Week 7
- Workout – 3 sets of 30 reps
- Workout – 1 set of 45 reps
- Workout – 2 sets of 35 reps
Week 8
- Workout – 2 sets of 40 reps
- Training - rest
- Workout (record) – 1 set of 55 reps
Week 9
- Workout – 3 sets of 35 reps
- Workout – 2 sets of 45 reps
- Workout – 3 sets of 40 reps
Week 10
- Workout – 2 sets of 50 reps
- Workout – 1 set of 60 reps
- Workout – 3 sets of 45 reps
Week 11
- Workout – 2 sets of 55 reps
- Workout – 1 set of 70 reps
- Training - rest
Week 12
- Workout – 3 sets of 50 reps
- Training - rest
- Workout (record) – 1 set of 80 repetitions
Week 13
- Workout – 2 sets of 60 reps
- Workout – 3 sets of 55 reps
- Workout – 2 sets of 70 reps
Week 14
- Workout – 1 set of 90 reps
- Training - rest
- Workout (record) – 1 set of 100 repetitions
Congratulations! Your journey from a beginner to a push-up pro took about 4 months.
What if, at the start of the program, you could do 20-30 push-ups? Then you can immediately start practicing according to the scheme from 4-5 weeks. And your path to 100 push-ups will be shortened to about 2 months!
What to do if you missed a week of training?
Then you should take a step back on the load. For example, you stopped at 7 weeks. After a week break, come back for week 6. And continue as usual.
Program “100 push-ups”
I have received many letters from people who are interested in the program for 100 push-ups at a time . To achieve this goal, you can use any of the above two programs.
If you want to perform one hundred push-ups, then you will need to do a total of 200 repetitions during your 5 sets . Basically, continue working on any of the above programs for a few more weeks and it will lead you to the desired result.
Beyond regular push-ups (advanced push-ups)
There are many variations of push-ups. As I mentioned earlier, arm position and different leg positions will change both the instability of the shoulder muscles and the demands placed on the shoulders and triceps.
Once you can safely perform 30-50 regular push-ups , you can try some more advanced variations.
Wide push-ups
The wide push-up is a compound exercise that targets the pecs, with less emphasis on the triceps than the standard push-up.
Important details for wide push-ups:
- Even if you do push-ups with wider arms, do them as you would a regular push-up: squeeze your butt tightly and don't let your chest sag.
- Control the position of your elbows. While they won't be pressed against your sides like we recommend in a standard push-up, they should be positioned at about a 45-degree angle relative to your torso.
- Place your hands slightly wider than shoulder-width apart to check your form. Continue to extend your arms by rotating your fingers outward as you become stronger in this exercise.
Finger push-ups
This variation is an excellent option for working with wrist or shoulder injuries. The exercise targets the same muscles as a standard push-up while relieving pressure on the joints.
Important details for finger outward push-ups:
- Make sure to keep your elbows close to your sides as you lower down.
- Don't let your shoulders rise towards your ears. Keep them pulled back and down throughout the entire movement.
Superman push-ups
Let's face it - mastering this push-up will really make you feel like superman. This is a crazy challenge for you.
Important details for Superman push-ups:
- The most important thing in this exercise is to make sure that your body does not sag. Really engage your core and legs to keep yourself upright.
- Start with your hands slightly in front of you and work your way up to a fully extended superman push-up.
The essence of the 100 push-ups course
The program is designed for two courses , differing in degree of difficulty.
- The average level of training is suitable for those who can do at least 8 push-ups at the initial stage.
- The advanced level, to begin with, requires the readiness to do at least 13 push-ups.
At any level and stage, it’s not scary if the number of repetitions is less than required, the main thing is to do push-ups until the muscles fail. Thus, gradually it will be easier for the muscles to cope with the load. And if you manage to perform more repetitions than indicated in the last approach (in the last column), then you need to squeeze out the maximum that the body can overcome. In this case, you can learn to perform a program of 100 push-ups even in 6 weeks.
The push-up course involves a progressive load, in which at least two more repetitions are performed every week.
It is important that in order to quickly master the course, you should not perform the exercise every day, this can lead to overwork and slow down progress.
If for some reason the repetitions are difficult, you can simplify the technique. For example, perform several approaches from your knees; this technique can help girls or those who are starting to do push-ups from scratch. Then go back to the lying position.
Read more about the push-up exercise in this article →