Plank on fitlopto
Place your forearms on a stability ball with your shoulders over your elbows, toes, feet together or hip-width apart, knees bent, hips down, and your entire body in a straight line. Inhale and prepare to exhale as you straighten your knees and hips into a plank position . Hold for a few breaths. Exhale and lower your knees to the starting position. Do 5 – 8 repetitions . This is what it should look like:
Fitball effectiveness
In order not to waste time and help you in the matter of forming a beautiful press, let's look at effective exercises using a gymnastic ball - a fitball - which rightfully deserves more and more attention and popularity today.
Classic crunches on a gymnastic ball
Often, beginners, when performing habitual crunches while lying on a training mat, make several mistakes:
- Engage the neck
- Strain your lower back
- Lifts up using your back
After such work on the abs, the next day they have pain in everything, but not the abdominal muscles.
The use of a fitball in this situation is beneficial because when twisting the body, only the abdominal muscles work, and the participation of the lower back is completely excluded. But this does not mean that the technique of performing crunches on a fitball is absent. Not at all! It’s just that this equipment is perfect for those who have back problems, have a large percentage of excess fat and weak muscles.
And the correct execution of crunches on the ball comes down to the following:
- There is no need to spring - the ball only takes the load off those muscle groups that should not be involved. While your abdominal muscles are still weak, during training stronger muscles will try to take over the load on themselves - this is normal, but you need to keep this moment under control and be able to turn off the “unnecessary” muscles and turn on the “necessary” ones in time.
- Twist into a “roll” - you often notice how inexperienced athletes, when moving from the bottom to the top point, straighten their back or leave it straight altogether. This is a mistake, since this removes the load from the abdominal muscles and transfers it to the lower back. The moment of twisting itself, both from the bottom to the top and back, must always correspond to its name. Mentally imagine how you roll yourself into a roll and turn back
- Watch your shoulder blades - the correct position on the fitball when twisting is when the bottom edge of your shoulder blades lightly touches the ball. If your shoulders rest on the exercise ball or, conversely, are moved too far beyond it, you risk straining your lower back.
Reverse Crunch Saw
This exercise has many names, but this one seems most suitable to us, since the movement resembles sawing an object with the mentioned tool.
Starting position - plank, with your shins on a gymnastic ball, straight arms resting on the floor. Begin to pull the fitball toward your chest with your legs straight or slightly bent at the knees, while lifting your pelvis up. Keep your emphasis on your hands, but do not completely transfer the load to them - you should feel good tension in the abdominal area. Beginners may not keep their legs straight all the time, but bend them at the knees - this will not reduce the effectiveness of the exercise. Exhaling at the extreme point, return to the starting position.
Remember that in the plank position your hips should not sag and your back should not be rounded. The body should form one straight line without bending - this is the only way to guarantee the effectiveness of the “Saw” on fitball without the risk of injury.
Bicycle twist: variation with fitball
We are all well aware of the Bicycle - no, not a type of transport for movement, but an effective exercise for working the oblique abdominal muscles. In the classic version, you need to pull the elbow of one hand to the opposite knee, alternately changing sides. We want to offer you a variation of it that requires more concentration and effort.
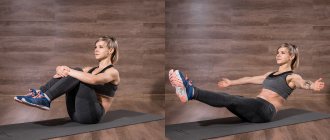
Sit on a gymnastics mat, straighten your legs and pick up a fitball. Bend your right leg at the knee, move your body with the ball to the right, trying to touch the opposite bent knee with your left elbow. Then repeat the same on the other side.
The difficulty of this exercise lies in the fact that at the time of execution, the legs should not lie on the floor, and an angle must be formed between the body and the lower part of the body so that from the outside it looks like the letter “V”.
“Plank” with emphasis on the knees
Your knees also need a stretch from time to time. Start in a plank position and place an exercise ball under your shins. The body forms a straight line from the shoulders to the ankles. Exhale. Pull the exercise ball toward your hands, bending your knees toward your chest. Breathe in. Place the stability ball back and return to the plank position. Repeat 15-20 times.
High Plank Hip Extension
This intense exercise from Ella Magers of Sexy Fit Vegan requires not only strong abdominal muscles, but also good balance. Start in a plank position with your feet on an exercise ball and your hands on the floor. Make sure your hands are directly under your shoulders. For balance, tighten your abdominal muscles. Raise your right leg about 15 centimeters from the ball. Stay in this position for a few seconds, then slowly return to the starting position, then repeat the movement with your left leg. Keep your leg straight (without bending your knee). Repeat as many times as you can.
Abdominal exercises for girls[edit | edit code]
Abdominal exercises for girls
- Posture Basics
- Balance while sitting on a gymnastic ball
- Contraction of the transverse abdominal muscles while standing on hands and knees
- Lying emphasis on the BOSU ball
- Reverse crunch on the ball
- Program for stabilizing abdominal muscles
- Two-stage twisting
- Twisting with body lift on an incline bench
- Twisting with body rotation
- Combined twist
- Exercise corner on the forearms
- Scapular stabilization on an incline bench
- Kneeling body rotations
The goal of functional training is to prepare the body for the demands of everyday life, that is, to strengthen the muscles that you use every day.
The key goal of training is to develop correct posture and maintain a balance between the strength and flexibility of opposing muscle groups (for example, the abdomen and back). The inability to control the position of your body negatively affects the quality, safety and efficiency of movements made during exercise. In this case, compensatory mechanisms come into play, but as a result, joints and muscles no longer work the way nature intended them to, which entails the risk of injury and premature aging, as well as the development of musculoskeletal problems typical of modern lifestyles.
Stabilizing muscles are called muscles, the main task of which is to maintain a stable position of the entire body and its individual parts in relation to each other and create reliable support for other working muscles. For example, when we flex our arms with a barbell at the elbow joints, the rotator cuff muscles stabilize the position of the shoulder girdle, and the abdominal and back muscles provide stability to the spine, while the biceps flexes the arm at the elbow joint.
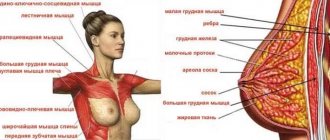
The abdominal muscles are one of the most important stabilizers of the body, and will be mentioned several times throughout the book. Other muscles that have important stabilizing functions and will be discussed in detail in subsequent sections include:
Leg stabilizing muscles
- Gluteal muscles
- Tensor fascia lata
- Rectus femoris muscle, part of the quadriceps femoris muscle
- Posterior thigh muscles
- Iliopsoas muscle
- Tibialis posterior muscle
Stabilizing muscles of the back and shoulder girdle
Superficial and deep abdominal muscles
- Erector spinae muscle
- Quadratus lumborum muscle
- Lower and middle bundles of trapezius muscle
- Serratus anterior muscle
- Rhomboid muscles
- Rotator cuff
If stabilizing muscles are not trained, they weaken over time. They are best strengthened by slow, controlled movements that require them to bear body weight for long periods of time. These are the exercises offered in this section.
Leg raise exercise
Kathy Corey Pilates, one of the original founding companies of Pilates, shared this fun and effective exercise . To begin, lie on a fitball, placing it below your stomach, with your legs straight. Place your hands on the floor and move forward until the ball is below your hips. Your fingertips should point inward. Lower your arms and lift your legs towards the ceiling. Spread your legs wider than your hips. Raise and lower your legs with small, quick strokes, then bring your legs together, lowering them low to the level of the ball. Straighten your arms and walk backward until the ball is below your torso. It's funny, isn't it? Repeat 10 – 20 times.
Rules for performing the exercise
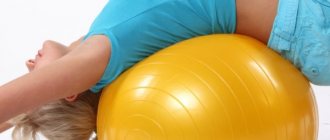
- Lie down on the exercise ball so that your lower back is pressed against the round surface of the ball. Bend your knees and place them firmly on the floor. The upper body should hang over the ball. Place your arms along your body or cross them over your chest to avoid straining your neck (as opposed to placing your hands at the back of your head).
- Lower your body and stretch out, keeping your neck still.
- As you exhale, keeping your hips still, bend at the waist, squeezing your abdominals and twisting your shoulders and torso until you feel your abs contracted well enough. If you place your arms along your body, then they should simply slide along the surface of your legs. If you cross them over your chest, leave them in the same position. Your lower back should be in constant contact with the ball. At the top of the exercise, stay for a few minutes.
- As you exhale, return to the starting position. Repeat the recommended number of times.
Warning: Do this exercise slowly and carefully as it takes some getting used to. When performing the exercise for the first time, you should not use weights - first learn to maintain balance. If you have trouble keeping your balance, have someone help you or for added stability place each foot under a 50kg dumbbell. Once you have gained experience, you can pick up a dumbbell or disc (holding it at arm's length). However, be careful when adding weight as you risk a hernia.
Variations: You can perform this exercise with a low block. This way, with increased resistance, you will move more easily. To perform the exercise in this way, you must hold onto the ends of the rope throughout the entire movement. It is best to pull your arms forward until your shoulders are parallel to your body and your forearms are directed in the direction opposite to the tension of the cable.
Alternative Exercises
Side Twists (Single Leg Teaser with a Twist)
To begin, lie on your back, holding the exercise ball above you with both hands, keeping your legs straight and together. Rotate your torso, extend the ball forward, and lift one leg off the ground. Bend the knee of the raised leg while rotating your torso to rotate it in the direction of the bent knee. Keep the other leg firmly planted on the ground. Straighten your raised leg and lower yourself a few inches. Repeat the movement three more times on the same side and switch legs. Here's how Pilates Anytime trainers do this exercise.

