Hadoo gymnastics has recently become increasingly popular, not only in European countries, but also in other parts of the continent. And the point is not that it suddenly became fashionable. This set of exercises really works. It helps develop strong muscles and normalize weight.
Gymnastics was invented by Zviad Arabuli, born in Georgia and moved to Moscow and then to Kyiv. The system of exercises they developed is based on alternate tension and relaxation of various muscle groups, which brings a therapeutic effect. Charging Khadu got its name in honor of the native village of its author. It was there that he was born and raised.
Indications for the use of Hadu gymnastics
This set of exercises can be called - hadu for every day. It can be used by a variety of people. With a variety of problems.
- osteochondrosis;
- intervertebral hernia, and on any part of the spine;
- protrusion of intervertebral discs;
- intervertebral disc displacement;
- rachiocampsis;
- arthritis;
- high blood pressure, chronic;
- chronic migraine caused by poor blood circulation in the brain;
- diseases of the gastrointestinal tract;
- impotence and prostate disease;
- metabolic disease.
This is not the entire list of pathologies and dangerous conditions for which Hadu gymnastics is indicated as a therapeutic agent.
The essence of the Hadou method and its philosophy
The goal of the technique is to combine the harmony of a healthy body with the universe. In the old days, few people sought harmony through exercise. Nature has endowed the human body with a large number of muscles, but only a small part of them is used in everyday life. In order to conserve energy potential throughout the body, it is necessary to constantly use it. The muscles, which are given by nature, must constantly work, and the body must tire and recover.
Attention! Thanks to Hadu exercises, the muscles do not become physically tired. It helps develop the will and the body as a whole.
The founder of the method, Zviad Arabuli, believes that there are several main systems in the body:
- the main one, thanks to which the body moves, is the musculoskeletal system;
- metabolism, due to which the musculoskeletal system fully functions;
- controls the two previous systems - nervous.
The more developed the musculoskeletal system, the healthier the metabolism and nervous system.
Principles of Hadou gymnastics
Khadu uses 3 main principles that distinguish it from similar complexes:
- Gymnastics is done without sports equipment, such as barbells, dumbbells, weights. Muscles are loaded by other muscle groups that have opposite effects. A simple example of opposing muscles is the biceps of the arm and its triceps. The muscles are on opposite sides of the forearm. Given that a person does not use additional load for exercise, the risk of damaging the spine or joints is minimized.
- All exercises in the Hadu complex are done extremely slowly, with maximum muscle tension. This allows you to use deep muscle tissues that are not normally used.
- Khadu gymnastics uses all the muscles of the body. Even those that the average person doesn’t know about. For example, the muscles on the outside of the fingers or shins. And also all the muscles of the face.
It takes approximately 1 hour to complete the full Hadu complex. This is provided that all exercises are done correctly, with the required speed and tension. After such a workout, a person should feel very tired. If this feeling is not present, it means that the complex was not performed correctly and should be repeated, but under the supervision of a professional instructor.
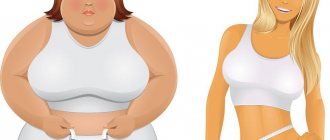
Benefits of Khadu for weight loss
When intensively performing Hadu gymnastics, the body not only renews energy, but also burns excess carbohydrates. Movement requires a lot of energy, while it improves metabolism and eliminates toxins. Looking at all of the above factors, we can say with confidence that with constant exercise in Hadu gymnastics, weight loss is possible.
- Related Posts
- Facial massage with spoons at home - flow chart, video
- Yoga for face lifting and rejuvenation - 12 video lessons with Elena Rodicheva
- Facial fitness with Alena Rossoshinskaya
« Previous entry
Safety precautions
Before you begin to master and use Hadou gymnastics, it is recommended to visit your therapist. If your doctor allows you to exercise, then you can start. It is important to follow certain safety rules:
- Movements are performed smoothly, without jerking.
- The load increases gradually. There is no need to try to perform the exercise with maximum load; the body must get used to it.
- You need to breathe evenly and deeply. Inhale through your nose, exhale through your mouth.
- If you feel dizzy during your workout, you should stop. After regaining your breathing and strength, you can continue the lesson.
- If you experience pain in the spine while performing any exercise, you should stop training and consult a doctor. It is advisable to see a surgeon. It is important to understand that the spine should not be loaded in any way when pain occurs; this can lead to serious and dangerous consequences.
Basic exercises of the Hadu complex:
- The first in this complex is to warm up and work out the facial muscles. To do this, you need to close your eyes tightly several times for a few seconds, this is the so-called warm-up for the face. After this, you need to raise and lower your eyebrows 10-15 times. Remember the main rule - as slowly as possible and extremely strongly, with tense muscles.
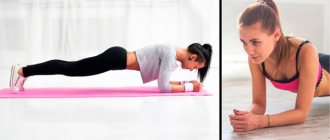
- “Pumping” the back muscles. You need to imagine that you are lifting a barbell and holding it on your shoulders. The legs are spread wide apart, the knees are bent, and the back is so straight that it is slightly arched back. You need to breathe evenly and deeply, as if there was a candle a few steps from your face that needed to be blown out.
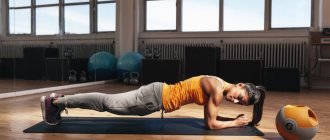
- The exercise is also performed with a “barbell”, but lying on your back. The arms are spread wide, the shoulders are laid back as much as possible. It is necessary to do 12-15 “presses” without forgetting about proper breathing.
- Bloating of the abdomen. During the exercise, the back is relaxed and even slightly bent forward, arms are lowered. As you inhale, you need to inflate your stomach, making sure that the chest does not move. When you exhale, the stomach deflates. All this time, the abdominal muscles should be tense. This exercise is repeated 20 times per workout.
- The exercise is called the “gorilla walk” because it really resembles the way this primate moves. The back is relaxed, arms are lowered along the body. When walking, the pore bends from left to right, so deeply that the lower rib touches the pelvic bone. At the same time, when touching, you need to exhale. For one exhalation, there should be 4-5 touches of the pelvic bone of the lower rib.
The same must be done with the lips - only the lips folded into a tube do not move up and down, but from left to right. The facial gymnastics ends with simultaneous squeezing of the eyelids and lips. With ever increasing speed and strength.
It may seem strange to someone that tension without load can develop muscles and make a person lose excess weight. But even at the dawn of bodybuilding, the teacher of such athletes as Arnold Schwarzenegger and Lou Firinho, the great Joe Weider, wrote in his book that it is not enough to lift the barbell, but you need to think about how the muscles work, how they fill with blood . Because the brain must control the muscles. So Khadu’s gymnastics, a kind of continuation of the teachings, is a champion trainer.
1. Weightlifter's stance and chest breathing
The photo on the left is the starting position. It forms correct posture and strengthens your back. Feet wider than shoulder width, knees slightly bent, feet as parallel as possible. The knees are approximately above the feet so that the legs do not look like the letter X or O. The weight of the body is distributed evenly over the entire foot. The shoulders are lowered and turned, the back is arched so that a saddle is formed in the lumbar region. In this position, the back has maximum resistance to stress, so it is recommended to lift weights in this position. Hence the name.
First of all, learn to inhale through your nose and exhale through your mouth through tightly compressed lips, as if you were extinguishing a candle from a distance. Inhalation and exhalation should be slow, smooth, without jerking. We take a deep breath with our chest, pause a little at the extreme point, turn our shoulders as much as possible and bend our back.
Then, slowly, we exhale. In this case, you need to slouch, as in the photo on the right. The shoulders should hang on the neck. In addition, you need to kind of tuck your pelvis inward. The abdominal muscles should be tense. Please note that the head is always straight. It's good if there is a mirror in which you can control yourself. The main point in the first three exercises is the work of the spine. We knead it in the forward-backward direction.
Do not hurry! Only slow motion. This is a guarantee that you will not harm yourself. Spend some time mastering this exercise. In various variations, this movement of the spine will be used often. In the meantime, repeat 8-10 times.
2. Fists to the ground
Let's add arm movement to the previous exercise. As you inhale, move your elbows back (palms are open and facing up), and as you exhale, press your fists into the ground between your knees. Hands are constantly tense. Try to ensure that your shoulder blades literally touch each other as you inhale. As you exhale, your shoulders drop down; they should just hang on your neck. Pull your shoulder blades down so that the muscles between them stretch (this is the thoracic spine). As you exhale, clench your fingers until they are bent, but not into a fist. The head stands straight, without bending. Pay attention to the position of the hands at the end of the exhalation. Knuckles to knuckles, palms facing out. Repeat 8-10 times.
3. Chest press
Wide grip imaginary barbell chest press. As you inhale, the spine bends, forming a saddle (as in the previous exercises), and as you exhale, it bends like a wheel. Try to expand your chest as much as possible when inhaling. As you exhale, stretch forward, stretching your shoulders, as if clinging to something. You can also imagine that someone is pulling your hands forward. The hands do not relax, and the imaginary grip always remains wide. Repeat 8-10 times.
4. Ring
There is a rubber ring in front of you at face level. As you exhale (photo on the left), it pulls your arms forward, as if it wants to pull out your arms along with your shoulder blades. The back is arched. Feel the muscles stretch between your shoulder blades. Note that the palms are turned outward.
As we inhale, we stretch this ring, unfold our chest and bend in the lower back. We perform both inhalation and exhalation powerfully and smoothly. Repeat 8-10 times.
5. Bodybuilder
We imagine ourselves as a bodybuilder on stage. It would be good to do this exercise in front of a mirror. Raising our hands, we take a deep breath.
We gradually exhale and group ourselves a little as in the photo. The arms are always tense, both during inhalation and exhalation. Let's not strain ourselves! The air must come out. It's like you're saying a long FU-U-U as you exhale. When exhaling, keep your hands in front so that you can feel the muscles between your shoulder blades stretching.
A wide-range and very effective exercise for the thoracic spine, chest muscles and the entire shoulder girdle. Do not perform it without first warming up! Otherwise, you may strain your back muscles.
Always look in front of you, preferably in the mirror. 10-12 times.
6. Rack
Squatting slightly at the knees, we bend over and stretch our arms forward. The angle between the hands is about 90 degrees. The lower back is arched. You can't hump your back! Imagine that you grab two ropes (photo on the left) and then, as you exhale, pull them towards you (photo on the right). The abs, shoulder muscles, and arms are tense. A very strong exercise. When performed correctly, it is the heaviest of the entire complex. We perform both inhalation and exhalation powerfully and smoothly. Repeat 8-10 times.
7. Monkey walk
In previous exercises, we rocked and kneaded our backs back and forth, but now we’ll swing them left and right. Slowly, we shift from foot to foot. This is how an important, self-respecting monkey moves. Smooth and powerful. We tilt the shoulder towards the straight leg, trying to ensure that the rib touches the pelvis. The abdominal muscles are always tense. Inhale through your nose. Exhale for a long time through the mouth, so that for one exhalation there are several swings.
Repeat 15-20 times. Don't slouch.
You see in the photo the right leg has come off the floor. It is not right!
You cannot lift your heels off the floor.
8. Pelvic rotation
Rotations of the pelvis, smooth, amplitude, on slightly bent legs. The abdominal muscles are tense. More feline grace and eroticism in motion. Watch yourself in the mirror to make sure you look beautiful. Use any familiar dance moves. Improvise! Just do everything slowly and with tension. It is necessary to complete the warming up of the lumbar region. Do not forget about symmetry - movements first in one direction and then in the other. And don't rush. Movements should be smooth and felt.
As a rule, rotations in one direction are easier than in the other. Don't make your life easier - learn to twist equally well in both directions.
9. Abdominal breathing
We stand with our legs slightly bent at the knees. Slouched a little. Now the chest is motionless and inhalation is done through the “stomach”. In this case, the volume of the lungs increases only due to the relaxation of the diaphragm muscles. When your stomach is so swollen that you look like someone who swallowed a ball, you can begin to exhale through pursed lips. The chest should remain motionless. There is no need to exhale quickly. Our task is to feel the process of exhalation itself. The abdominal muscles should be tense. Repeat 15-20 times.
In addition to developing the diaphragm, this exercise perfectly massages the abdominal organs and causes a flow of fresh blood to them. This is extremely important, because they lie motionless for years, suffocating from stagnant blood. We need to stir them up, let them stretch or shrink, and ultimately rub against each other. If you do nothing, it will only get worse. Therefore, breathe and do not be surprised when the gastrointestinal tract starts working normally, in particular, constipation goes away.
10. Suck your stomach in
Standing straight, raise or protrude the chest, drawing in the stomach. At the same time, the back bends. The back muscles running along the spine (latissimus) tense and lock the lower back. And the shoulders are pulled back as much as possible. Stay in this position for two seconds and calmly return to the starting position. In other words, we walk chest forward or take a blow to the chest. Repeat 10-12 times.
Now the pace can be accelerated. With a short inhalation or without inhaling at all, draw in your stomach in the solar plexus area, as if you were getting hit in the gut. 20-25 times. After the exercise, at a minimum, you should just feel your solar plexus. If you feel it, does it mean you have it in place? This is good.
This exercise perfectly develops the intercostal muscles and diaphragm. Inhalation coincides with the rise of the chest, this is the so-called synchronous breathing. The intercostal muscles tense and push the ribs apart. After some time, your chest volume will increase and, accordingly, your lung capacity will increase.
At an accelerated pace, try not to inhale deeply, so as not to hyperventilate the lungs, otherwise you will feel dizzy and even faint. Such caution must be observed in the first two months of classes. Later, the body will develop a system of self-regulation, and such trouble will not be feared.
11. Look left - right
We stand straight, without slouching. We tense our jaw, slightly sticking it forward. We don’t clench our teeth. In this position, the muscles of the front surface of the neck should be tense. Many of the muscles are left with pitiful fibers, but we can return them to their proper shape. Without haste and without relaxing, we turn our heads to the left as far as possible, and then to the right. Repeat 15-20 times.
Breathing is voluntary. Do not hurry! And without sudden movements. With age, salt deposits make themselves known more and more often. To avoid causing pain, follow this simple rule. Do not hurry! Women's necks age first of all. It happens that the figure is toned, the face is well-groomed, but the neck is flabby. Cosmetics are helpless here, so high collars and scarves come to the rescue. The cause of premature aging of the neck is muscle atrophy. If the muscles at the back of the head at least support the head during the day, then the muscles at the front of the neck do not work at all. Their purpose is to open the mouth, lowering the lower jaw. But since we are upright creatures, our jaws, as a rule, drop on their own without outside help. As a result, the neck, the part of the body through which the whole body communicates with the brain, turns out to be the most damaging link for health.
12. Boxer
As you inhale, bend over, tilt your head back as far as possible and pull your jaw up. The arms are laid back as in the photo. Imagine exposing your breasts to the sky. The trachea will stretch, so a slight cough is possible at first. The chest is maximally expanded.
As you exhale, we slouch, cover our heads with our hands (like boxers) and press our chins to our chest. If your chin does not reach your chest, you can lightly press your fingers on the back of your head. Just don't overdo it! And under no circumstances rush! This exercise stretches the cervical and thoracic spine, so be careful. The neck and arms are always tense! Repeat 10-12 times.
13. Chinese bobblehead
Exercise for the cervical spine. We stand with our arms to the sides at shoulder level. Elbows behind your back if possible.
As you inhale, gently throw your head back, bend slightly, and raise your shoulders. The neck muscles are tense and do not relax. Our task is to rest the back of the head against the shoulder blades as much as possible. The back of your head should be tired, numb and burning from the flow of blood. This is a sign of deep study. Repeat 20-25 times. Attention! No sudden movements! Everything is done smoothly!
One of the reasons for the age-related increase in blood pressure is the narrowing of the lumen of the vertebral arteries (sclerosis). The “Chinese dummy” exercise is an excellent prevention of this phenomenon.
14. Twist
In this exercise, the chin does not come off the chest. As you inhale, expand your chest as in the photo. Moreover, the chin is tucked as high as possible.
As we exhale, we twist, arching our back like a wheel, and twist our head around our chin. We turn our arms outward with our elbows and pull our shoulders down. Notice the movement of your pelvis. As we exhale, we seem to fold around the peritoneum.
The exercise is especially good for developing the thoracic spine - a dead zone for most people. If you look from the side during twisting, you can clearly see how static this area of the spine is between the shoulder blades. We need to rock her and give her life. But no sudden movements. Repeat 8-10 times.
15. Dinosaur
The final exercise from the spinal series. Legs widely spaced. As you inhale, bend forward with your back bent. The loin is locked and forms a saddle. We seem to drop our belly between our knees. The head looks up as in the photo. Pull the back of your head back so that you feel the back muscles stretch to the lower back.
As you exhale, straighten up and at the top point, tuck your chin to your chest.
Then, completing the exhalation, we perform a twist as in the previous exercise. Repeat without haste or fuss 5-8 times.
16. Face
This is the first time you will do this. Make a wish and get rid of the idea that this causes wrinkles. Look at the crease of your elbow. Are there any wrinkles there? The face and neck age first of all precisely because they never exercise. The main point of advertised cosmetics is to moisturize and nourish the skin. The idea is correct, but why give up the natural way. The skin is nourished by the tissues it covers. Warm up the facial muscles, disperse stagnant blood, allow the body to remove metabolic products and deliver fresh hormones and blood to the right place. Notice how with age, in parallel with the aging of the face, facial expressions become poorer and more inexpressive. Facial expressions are muscles. And the muscles need training. In addition, the area of the brain responsible for facial expressions will be normally supplied with blood only if these same muscles are regularly trained. Read more here.
So - antics in front of the mirror. Beauty is a terrible power! The most relevant exercise for women. We then stretch our face, opening our eyes; then we shrink it, covering our eyes with our cheeks. If you don't know how to make faces, learn. Our task is to tire the facial muscles. It is very important to feel them. They should be numb and warm. Only in this case will the face receive nourishment from the inside.
The exercise consists of two phases. The first (photo on the left) is facial stretching. Imagine expressing extreme surprise or saying a long O-O-O without opening your lips. The lower jaw should drop, and the upper lip should be pulled down so that the nasolabial area is developed. Make sure your forehead muscles are working. When stretching the face, they should extend to the back of the head.
The second phase (right photo) is compression. We close our eyes with our eyebrows and cheeks, powerfully and strongly. The lower jaw rises up but the teeth do not close. 50-60 reps. Any pace is convenient.
From the outside it may seem funny and amusing, but the importance of this exercise for health cannot be overestimated.
.
17. Eyes
After fresh and hot blood has passed through the spine and neck and washed the face, it must be directed into the eyes.
We simply move our eyes from left to right and vice versa. You just need to do this with some pressure, as if pointing your eyes left and right. It is recommended to close your eyes to help them warm up. 50-60 reps. In the extreme positions of the eyes, it is recommended to see multi-colored circles.
Now let’s do the same in the vertical plane: up all the way and down, also all the way. 50-60 reps
Now let's train our eyes by moving them diagonally. At first it's like that.
Then along the other diagonal - like this.
Finally, let’s perform rotational movements with the eyes in one direction and the other.
.
We should feel warmth in the eyes from the rush of fresh blood. In addition, the eyes will be covered with a thin film of secretory fluid that moisturizes the apple. If this does not happen, do not despair, the best is yet to come. You will also feel some muscle fatigue in the depths of the eye sockets, behind the eyeball. This is good, it means they worked in good faith.
18. Eyes (training focus)
So, we have raised the blood along the spine to the head and our eyes are bathed in hot blood. It's time to train the accommodative apparatus to force it to change focal length.
With your arm extended, focus your attention on one finger. Try to clearly see the folds of skin on it. As you bring your hand closer to your face, keep your finger in focus. At some point, the capillary pattern will begin to blur in the eyes. This is the border. Moving your hand back and forth, try to push the boundaries of this border, forcing your eyes to keep focus. Move your hand left and right, up and down near the border. Try to make the design on your finger clearly visible.
2-3 minutes is enough. All doctors recommend such exercises as a preventive measure. But then the exercises are performed on a cold body. Now the blood is hot, saturated with oxygen and hormones, the metabolism has been accelerated by previous exercises. Therefore the efficiency is higher.
19. Biceps press
We imitate the classic barbell press for biceps. As you inhale, your arms are open, as you exhale, they are clenched. Biceps and triceps are always tense. The muscles do not want to hold tension all the time, so it is necessary to consciously stimulate them periodically. Inhale and exhale deeply and slowly. Repeat 10-12 times. Extend your arm at the elbow completely, until it is perfectly straight!
20. Biceps behind the head
Arms to the sides, elbows not lower than shoulder level and pulled back as far as possible. Slowly, we bend and straighten our arms. As you inhale, bend your arms behind your head, and as you exhale, straighten them. Elbows should remain back. We don’t relax our hands. Repeat 10-12 times.
The arm in the left photo must be fully extended!
21. Antique dance
The exercise is reminiscent of ancient dances. A good stretch for the shoulder girdle. We twist the shoulder joint in one direction or the other. Hands are tense and do not relax. At the extreme points, the palms look to the sky. Imagine that two ropes are tied to your hands, and you are twisting on them. 10-12 times.
22. Birdie
A very simple and very effective exercise. Starting position – standing, arms to the sides, just below shoulder level, elbows behind the back. From this position, we simply raise our arms (as we inhale) and return them (as we exhale) to their original position. Those. we flap our wings. Do not lower your hands below the starting position! Repeat smoothly and without jerking 12-16 times. Breathing is shallow. After the exercise, your arms just fall off, and that’s good!
23. Skier
The torso is tilted forward, the back is arched, the elbows are bent, the hand is turned back. Exercise for triceps. As you exhale, forcefully straighten your arms without changing your body position. Repeat 10-12 times.
24. Frog
Imagine that you are holding a stick behind your back. As you inhale, lift this stick up, and as you exhale, lower it to the back of your head. Please note that as we inhale, we stretch our entire body upward, draw our shoulders in, and even stand on tiptoe. As you exhale, we squat slightly, arching our back, and try to bring our shoulder blades together. The imaginary stick is always behind the back. The exercise is similar to pulling over a block behind your head. The position of the hand resembles a hook. Hands are tense and do not relax. The back is arched. Repeat 10-12 times. In addition to the shoulder girdle, this exercise works well the latissimus muscle and the lumbar spine. After the exercise, you can stretch your lower back by leaning forward on straight legs.
25. Wrist rotations
We stand straight. Forearms parallel to the ground. We rotate the brushes in one direction or the other. 20 times. Everything is done with effort and not quickly. We try not to chatter with our elbows, only the hand moves. Muscles, as a rule, do not want to tense or do not know how. They must be forced to perform the entire movement in a circle with tension.
26. Gas on a motorcycle
Hands like a praying mantis. Forearms in front of you and parallel to the ground. Strongly and slowly, we accelerate on the motorcycle. 15-20 times. The amplitude is maximum.
27. Fingers
Two exercises to strengthen joints. The starting position is the same: the fingers are straight and pressed one against the other.
1 - Bend the ends as in the photo, then straighten them. When bent, the fingertips should rest against the base. We also bend the thumb. With effort and without jerking. 20 times
2 - Now we place the phalanges flat on the palm. Movements are smooth. The fingers are tense and do not relax until the exercise is over. Also 20 times.
28. Wide grip
Fingers spread out. With effort we round them a little, and then spread them out again. Make sure your fingers are rounded at all joints (don't forget the little finger). Repeat 10 times.
29. Frog leg (stretch)
Hands raised to shoulder level. The fingers are spread out and tense. Exhaling, we lower our hands down, while pulling our fingers as high as possible. We slap the ground like a frog with our paw. Just slowly and with effort.
At the bottom point, relax your fingers. Then, inhaling, we raise our arms up. That is, the downward movement comes with tension, and the upward movement is relaxed.
Repeat 10-12 times. After this exercise, the wrist extensors should become tired.
30. Swallow
We lean on a chair for balance. Place your straight leg back on your toes. We lift this leg off the floor and bend it at the knee (as in the photo on the right), while inhaling and bending slightly. Make sure that your knee does not move forward when bending. As you exhale, we straighten the leg and pull the toe, but do not place it on the ground. We try not to bend the supporting leg at the knee. Repeat for each leg 20 times.
Typical mistake! The toe must be pulled up!
31. Straighten your legs
Sitting on a chair, while inhaling, we tuck our legs under ourselves. Then, as you exhale, straighten it. The legs are tense both during inhalation and exhalation.
Repeat 8-10 times. Please note that we do not push our legs, but straighten them. That is, the knee is as motionless as possible.
32. Bicycle
Sitting on a chair, we imitate riding a bicycle. Only our bicycle is old, rusty and heavy, so we pedal hard and slowly. We don’t rotate the pedals, we push them. We try to raise our knees higher. 20 revolutions are enough.
33. Feet up and down
We sit on a chair. The legs hang down, but do not touch the floor. Raise and lower with the force of the foot. Do not keep your legs straight, bend them slightly at the knees so that the thigh muscles do not strain. The amplitude is maximum. 20 times.
34. Foot Rotations
Now we rotate the feet. 20 times in one direction, then the same amount in the other. Everything is done with effort, without haste. The joints should warm up well. The amplitude of rotation is maximum.
35. Chicks
We straighten our feet as much as possible and bend our toes upward, as if we were standing on tiptoes.
Then we pull the foot towards ourselves, and bend the toes down with a hook. Infants perform similar movements when their reflexes are tested. Repeat 25-30 times. back
Rules for performing gymnastics
This technique was developed by a man and has a tough approach. It is necessary to strictly follow all recommendations for performing exercises.
There is no need to make any changes to the developed technology, since the complex is complete, well thought out and tested. If you follow all the rules and recommendations, Hadu gymnastics will ensure you get the most effective results. Significant physical activity activates blood flow.
Much attention is paid here to correcting the muscles of the face and neck. The described type of exercise does not contain direct tactile effects on the skin. Gymnastics is performed solely by moving the face. Therefore, performance depends directly on the quality of muscle work. Each exercise must be performed until the fatigue stage is reached.