What is the essence of the Oxycise method?
The method contains only static exercises without additional equipment, and attention is more focused on special breathing during the exercise. While holding the pose, a breathing pattern is performed that provides excess oxygen to the body, which stimulates the burning of fat cells and also speeds up the metabolism.
The author of the oxysize technique is Jill Johnson.
Oxysize: how many times should I repeat the exercises?
Oxysize: how many times should I repeat the exercises?
Not all exercises will be easy for you, especially at first.
Important: Pay attention to your body’s reaction. If a position is difficult to do, don’t make much effort.
- Work out for a week without heavy loads, and then add breathing cycles and the number of repetitions.
- How many times to repeat exercises using the Oxysize technique depends only on your physical fitness and the capabilities of your body. It is optimal to do 3-5 repetitions of 3-4 breathing cycles. You can do more or less.
- If you have a lot of excess weight, then for the first 2 weeks it will be difficult for you to perform even the simplest exercises.
Important: The body will be unusual in receiving large amounts of oxygen. This state of shock is considered normal for Oxysize - do not stop breathing exercises under any circumstances.
Bodyflex or oxysize - what is more effective and what is the difference?
Now let’s compare the oxysize and bodyflex breathing techniques. If in oxysize there is a continuous supply of oxygen, which is a well-known powerful fat burner, and without its presence oxidative processes - fat burning - do not occur, then bodyflex involves holding your breath for a short time, after which oxygen is supposedly absorbed many times more.
In bodyflex, you take a deep breath through your nose, exhale noisily through your mouth, tensing your abdominal muscles, and hold your breath for about 12 seconds. This technique has not been proven to be beneficial and has not brought many the expected results; moreover, holding your breath can be very dangerous.
Oxysize has fewer contraindications. It is continuous breathing that makes oxysize at least safe, so it can be argued that it is more effective.
Oxysize breathing technique
Exercises of the gymnastic complex are performed in combination with a series of long and short inhalations and exhalations. They make up one approach and are done in the following sequence:
- Deep breath.
- Three short breaths.
- Exhale completely.
- Three short breaths.
The oxysize system is based on diaphragmatic breathing, which actively saturates the blood with oxygen. When using this technique, the abdomen inflates during inhalation and deflates during exhalation. Breathing is performed according to the following pattern:
- Stand up straight, place your hands freely along your body or on your belt. To better control your breathing, you can keep one hand on your stomach. Take a calm, but intense and long breath through your nose. The abdomen should inflate slightly, as if air is entering there.
- Take 3 short, quick breaths. Many people make a serious mistake at this stage - they combine inhalations with exhalations. You can’t do this: make sure that the air only flows in and does not go out. With each short breath, you need to tighten your stomach a little.
- Exhale forcefully through slightly parted lips. It is important not to fold them into a tube, but to leave them flat. Please note: when exhaling, you need to pull in your stomach as much as possible and feel how your abdominal muscles tighten.
- Complete the breathing set with three short exhalations, continuing to draw in your stomach with each of them.
To practice this technique, the author of the technique recommends that beginners practice without including gymnastic elements in the training. You can begin to fully perform basic exercises after the skill of proper breathing has been brought to automaticity.
Video: features of performing breathing exercises
Benefits and harms of oxysize
The advantages and disadvantages of the technique include:
- Strengthening muscles without putting stress on the spine.
- The exercises are performed without holding your breath, which is a safe method of training.
- Static breathing exercises strengthen the deep layers of muscles, improving coordination, mobility, and massaging the internal organs.
- General well-being improves.
- The complex can be performed at any age.
The disadvantages include a number of contraindications - a natural phenomenon for physical activity. Therefore, before starting classes, you should consult your doctor.
Another disadvantage is the low effectiveness of training , which slowly leads to positive results, although the author of the method claims effective and rapid weight loss.
Oxysize: general characteristics
Oxysize breathing exercises are the original development of American teacher Jill Johnson. She struggled with excess weight for many years to no avail, and after using newly invented gymnastics, she managed to lose several sizes in just a month and a half. In Russia, the continuator of the technique was fitness instructor Marina Korpan.
Thanks to breathing exercises, Jill lost weight from size 16 to size 6 (corresponding to Russian sizes 56 and 46)
The main component of the oxysize system is a special technique of continuous deep breathing. Its use in combination with gymnastic elements increases the effectiveness of training several times. Due to the saturation of tissues and cells with oxygen, all processes occurring in the body are accelerated, so the burning of fat deposits occurs more intensely than during normal physical activity.
Excess oxygen allows you to speed up metabolic processes in the body and burn calories more intensively.
Basic oxysize exercises are performed statically and do not require active movements, so they may seem too simple. However, the vast majority of beginners are convinced of the opposite from the very first lesson. Performing elements requires concentration and attentiveness, and physical stress during training can be even greater than during intense dynamic loads.
The author of the technique claims: if you train daily, the first results can be seen in 1–2 weeks. Using the oxysize technique, you can not only lose weight, but also increase muscle tone in a short time and make your body noticeably more toned.
I have come across information that with daily exercises using the oxysize system, about 3% of weight is lost in 14 days. That is, with a body weight of 60 kg in 2 weeks you can lose almost 2 kg. The author of gymnastics promises this effect. Taking into account the fact that training does not require much time and effort, this result can be considered quite successful. But I know from personal experience and from the examples of friends that the weight comes off well in the first couple of weeks of training, and then very often freezes in place. As a result, many become disappointed, lose motivation to continue exercising, and quickly return to their original body weight. Those who want to get good and stable results should be patient and not give up training (even if it seems that they are not working).
How does the exercise technique differ from the bodyflex technique?
The technique used within oxysize gymnastics eliminates breath holding, which is a mandatory component of the bodyflex system. This feature is important for those who plan to practice on their own: even if at first you don’t manage to breathe correctly, the likelihood of negative health consequences tends to zero.
Oxysize exercises are performed without sharp tension in the abdominal muscles, which is an integral element of bodyflex training. This makes the technique more gentle and atraumatic, which is also important for those who intend to master it at home.
Contraindications for exercise
Oxysize gymnastics is characterized by soft loads. In this regard, it is widely believed that the technique is suitable for absolutely everyone (regardless of health status). However, it is not. You cannot exercise using the oxysize system during pregnancy, after a cesarean section or other abdominal surgeries. There are a number of other contraindications:
- asthma;
- cardiovascular pathologies;
- epilepsy;
- increased intracranial pressure;
- myomatous nodes and cysts in the abdominal cavity;
- pulmonary hypertension;
- hiatal hernia;
- aortic aneurysm;
- cerebral aneurysm;
- kidney disease;
- glaucoma.
Any of the listed problems is a reason for medical consultation before starting classes. It is usually possible to start training after pregnancy and childbirth, cesarean section or other surgical intervention after 6-8 weeks. However, it is important to consider that each case is individual and recovery of the body may require more time, so you should also consult a doctor before exercising.
How to do an oxysize workout for beginners
In order for the technique to be beneficial, the author of the program gives the following recommendations:
- Train on an empty stomach or 2-3 hours after eating.
- Eat your meal an hour after your workout.
- Train for half an hour 5-7 times a week.
- Perform the exercise for at least 30 breathing cycles.
Oxysize exercise set
It is recommended to perform the exercises for at least 30 breathing cycles, but for beginners this number can be reduced in the first week of training.
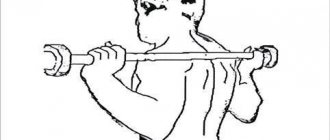
Exercise No. 1
Technique for strengthening the gluteal muscles. Place your feet pelvis-width apart, tip your pelvis over, bend your knees, twist your tailbone down, making your lower back flat. While maintaining tension in the buttocks, perform the oxysize breathing technique (1 cycle: long inhalation - 3 short inhalations, long exhalation - 3 inhalations). Do this for at least 30 breathing cycles, then recover for a few seconds.
Exercise No. 2
Standing with your feet hip-width apart, tuck your tailbone – your lower back is flat. Raise your right arm up and make a slight tilt in the thoracic region to the left. Breathe using the oxysize technique. Then change the side of the inclination and breathe the same number of cycles.
Exercise #3
Feet hip-width apart, bend your knees and place your palms on your hips, keeping your elbows straight. Pull your pelvis back and keep your back straight. Do a breathing exercise.
Exercise #4
For the exercise you will need support: the back of a chair and a table. Hold onto the support with your hands, but do not carry your body weight. Place your feet wide with your toes pointed apart. Tip your pelvis over, tucking your tailbone under you. Squat down in a plie and hold the position. Do a breathing exercise.
Exercise #5
Also hold onto the support with your feet together. Take your right leg back and lift it off the floor, tensing your gluteal muscle. Bend your supporting leg slightly. Do not lean your body forward. Keeping your right leg suspended, perform oxysize breathing exercises. Repeat the same number of breathing cycles on your left leg.
Exercise #6
Holding onto a support, place your feet together. Bend your right leg at the knee and lift it to the side, without tilting your body too much to the side. Keep your hip suspended by squeezing your gluteal muscles and hip abductor muscles, and breathe using the same technique. Then switch legs.
Exercise No. 7
A more complicated version of the previous exercise. Holding onto the support, lift your right leg to the side above the floor, bending at the knee. Then push your hip back without fully straightening your knee, thereby maintaining tension in your glutes. Perform the breathing technique, then switch legs.
Exercise #8
Hold the back of a chair or table with your hands, move your feet back as far as possible, forming an even line of your arms and torso - from your fingers to your tailbone. Arch your lower back slightly, increasing lordosis. Feet hip-width apart, knees straight, feel the maximum extension of the back of the thigh. Perform the breathing technique for several cycles, then walk your feet forward and straighten up.
Exercise #9
Sit on a chair, place your feet together, place your left palm on the chair behind your back and twist your body in the same direction, throwing your right arm over your head, stretching out diagonally. When twisting to the left, perform the breathing technique. Then repeat on the other side.
Exercise No. 10
Sitting on a chair, place both palms back on the seat, leaning your body back slightly, raise your legs above the floor, bending your knees slightly. When bending back, keep your back straight. While holding your legs, tighten your abdominal muscles and perform breathing techniques.
Exercise No. 11
Get on both knees on a soft mat, tip your pelvis over (twist your tailbone), hold your hands in front of you, you can make a finger lock with your palms facing outward. Lean your torso back, keeping your torso and hips in a straight line from your knees to the top of your head. Keep tension in your buttocks and abdominal muscles and perform the breathing exercise for several cycles. When finished, sit back on your heels and relax.
Exercise No. 12
Sit in a “butterfly” position: on your buttocks, with your feet together, with your sharp knees spread out to the sides as close to the floor as possible. Lean your body forward slightly and press your elbows into your inner thighs. Hold the position and breathe using the same technique. Finally, relax.
Exercise No. 13
Lie on your side with your lower arm resting on the floor. Keep your other hand on your belt. Raise your upper leg as high as possible, without tilting your pelvis and back, keeping your whole body in the same plane. Don't raise your shoulders, stretch your neck up. Keeping your leg suspended, breathe several cycles. Switch sides and lift the other leg.
Exercise #14
From the starting position of the previous exercise - lying on your side, twist your body, placing your elbows on the floor, but do not touch the floor with your stomach and iliac bones. Raise your upper leg up, straightening the knee, and pull the toe towards you. Hold this position and breathe as usual. Then turn over to the other side and do the same on the other side.
Exercise No. 15
Lie on your back, place your palms behind your head. Place your feet on the floor shoulder-width apart with your knees bent. Lift your shoulder blades off the floor, maintaining tension in your abdominal muscles, but do not lift your lower back or touch your chin to your collarbones—look at the ceiling. While maintaining tension, breathe as usual. Then lower your shoulder blades and relax.
Exercise No. 16
Stand in a plank position with your palms under your shoulders and your feet hip-width apart. Tighten your abdominal muscles while keeping your spine straight. Breathe according to a standard, unchanged pattern. After performing, place your feet on the floor and relax.
Exercise No. 17
Stand with your back to the wall, lean your elbows completely on the wall, place your feet forward together so that when you lower your pelvis down (slide along the wall), your legs and body form a “chair” pose - knees at right angles, pelvis at knee level. While holding the position, breathe as usual. Then straighten up and push off from the wall.
A set of oxysize exercises for the abdomen, sides, thighs and buttocks in video format
Oxysize with Marina Korpan: video lessons
Oxysize with Marina Korpan
In this video, the author gives a brief description of the respiratory system, answers questions that beginners often have, and conducts a lesson, explaining in detail each movement. This material will help you become familiar with the technique and is ideal for beginners.
Oxysize non-stop
Oxysize non-stop with Marina Korpan is a daily full complex, the sequential implementation of which is presented in the video.
Breathing exercises by Marina Korpan
This is another introductory video where the author will explain in detail the difference between bodyflex and oxysize and demonstrate several simple exercises from the complex.
Marina Korpan: Breathing exercises for weight loss
In this video, the author will demonstrate a complex for working out problem areas such as the lower abdomen and back of the thigh. She will also explain some general principles of oxysize.
Conclusion
To avoid health problems, it is necessary to master the technique of proper breathing, which is promoted by the Oxysize method. Reviews from doctors also confirm the benefits of this type of breathing for all organs and systems of the human body. The breathing system according to the Oxysize method recommends not only a deep breath, but also a full exhalation, due to which the blood is enriched with oxygen, as well as the maximum removal of carbon dioxide from the body.
Based on this theory, the Oxysize system for weight loss was built. Feedback from users of this technique is positive; positive dynamics in the condition of the body and weight loss are noted. However, do not forget that without following a diet and gymnastic exercises, the course developers do not guarantee any results. A moderate diet, healthy exercise and body care are the main components on the path to a beautiful and slender body.
Oxycise nutrition program. Setting up a diet and menu
Very often, when starting to engage in fitness, we make one mistake. Hoping that “everything will burn out during training,” we stop controlling our nutrition and, as a result, we don’t lose weight, and sometimes we even begin to gain weight.
To prevent this, during the oxysize marathon, take into account the recommendations of Marina Apletaeva, a nutritionist at the Alumed healthy nutrition clinic.
1. Try to eat no more than 1600 calories per day. If you are familiar with the food pyramid and are used to focusing on portions, this is: 6 servings of vegetables, 2 of fruit, 5 each of protein and grains, 2-3 low-fat dairy products and 2 servings of fat.
2. For the entire duration of the oxysize marathon, exclude sugar and any sweets, white bread and pastries from the menu. “It is they who, first of all, force us to get better,” says Marina Apletaeva. “It’s better not to eat boiled or baked potatoes, al dente (until half cooked) pasta every day: I allow my clients to eat them no more than 2-3 times a week.”
3. Since you will be working out on an empty stomach in the morning, and after training, according to the rules, you will not be able to eat for at least an hour, then it is important to eat something that will immediately provide you with a surge of strength and at the same time create a feeling of satiety for a long time. After all, there is a long working day ahead. “The combination of long and short carbohydrates is optimal,” says Marina Apletaeva. - Cereals with a low glycemic index (unpolished rice, buckwheat, oatmeal, millet, pearl barley) with fruits, berries, freshly squeezed juices.”
4. If you practice in the evening and have time to eat after class (in any case, dinner should be no later than three hours before bedtime), choose something as light as possible - a combination of vegetables and lean protein. “Make a green salad by adding crumbled cottage cheese, slices of turkey or squid.”
How to learn to breathe correctly?
To acquire diaphragmatic breathing skills, you need to take a deep breath, sending air into the lower parts of the lungs. In this case, the following happens externally: the shoulders remain motionless, the ribs diverge in different directions, and the abdominal wall moves forward. It is this type of breathing that is used if you are lying on your back, since in this case your shoulders are fixed.
Many people, when inhaling, draw air only into the upper part of the lungs, and a clear sign of chest breathing is the raising of the shoulder girdle. This type of breathing does not help saturate the body with oxygen, so it is advisable to learn to breathe “with your stomach.”
To see how beneficial deep breathing is, you need to conduct a small experiment. To do this, you need to use only lower deep breathing for 2-3 minutes. After this exercise, you will immediately feel dizzy, which occurs due to an active rush of oxygen to the brain.
This is the basic Oxysize breathing technique. Only deep diaphragmatic breathing is allowed when performing exercises of this system.
Advantages of the new technique
What else is attractive about the “Oxysize – Breathe and Lose Weight” method? Reviews from all adherents of this technique highlight its main advantage - it is a convenient diet without strict restrictions. In his book, the author of the technique prohibits a strict diet, arguing that with serious dietary restrictions, the body's metabolic functions may fail and weight loss may not occur. On the contrary, it is recommended to eat four meals a day with a limit on sweets, fried foods and fatty foods. That is, the basis of nutrition is healthy food in normal quantities - and the result is guaranteed!